Sunday, May 31, 2009

I made biscuits with Granny!!!

This is a very special recipe. It's my Granny's classic biscuit recipe straight from the hills of Tennessee. The trick, she says, is to put a thumb print in the top of every biscuit. It helps them rise and creates a nice little spot for butter or honey.

This is a picture of my sister and Granny right before we put the biscuits in the oven:


Granny's Biscuits
from Helen Hart
yield 3 dozen

Ingredients:
5 cups flour
3 teaspoons baking powder
1 teaspoon baking soda
1 teaspoon salt
1 cup shortening/butter
2 cups buttermilk

Directions:
1. Sift dry ingredients - really do this! It is what makes them fluffy. You can buy an old fashioned sifter with a hand crank, or you can toss the flour through a strainer, or even fluff with a fork, but get some air in there!

2. Thoroughly blend in shortening - the trick is to keep the shortening cold while blending. I'll tell you why - when the shortening melts in the oven it creates steam and gives the biscuits their lift and their moistness. My sister (who has tried this recipe several times) cuts the butter into tinsy tiny little cubes to reduce the amount of mixing she does with her hands.

3. Add buttermilk, blend in - keep this cold too.

4. Roll on floured bread board, cut - no need to roll too thin. The thicker biscuits the better, right? If you don't have a biscuit cutter, you can use the rim of a glass.

5. Bake on ungreased cookie sheet at 400 degrees until golden brown.

Really, this was easy! One mixing bowl, one measuring cup, a baking sheet, and 15 minutes!

Friday, May 29, 2009

I made tofu fajitas


Fajitas are pretty simple. Just a bunch of grilled stuff in a tortilla. Maybe served with some extras like rice and beans, cheese, guacamole, etc. Sadly for me, they usually include chicken or beef, and the "Veggie Fajitas" at restaurants are usually just a bunch of random grilled veggies. This dish needs some kind of flavorful protein. So I decided to attempt tofu fajitas.

Here's what you do.

Take a block of extra firm tofu and drain any excess moisture. (You can do this by placing a few heavy cookbooks on top and letting it sit for a few minutes.) Then slice into three 1/2 inch slabs, and place in MARINADE.

I made this up. It was pretty good. The measurements are not exact.

4 cloves diced garlic
1/2 c olive oil
1/4 c apple cider vinegar
juice of 1 lime
adobe sauce
1 or 2 chipotle peppers
few tbs braggs liquid aminos.

Stir all that up in a bowl, drop the tofu in and let sit for a while. 15 min to an hour.

Meanwhile, rub a griddle with oil (I have one of those big rectangular ones that takes up two burners) and slice up a red onion and a bunch of different colored peppers. Get the griddle nice and hot, and get that stuff cooking. It will take longer than the tofu.

After a few minutes, put the tofu on. Let it sizzle a couple minutes, then flip. It should be nice and browned with pretty grill marks.

When the veggies are a little blackened, take those off too.

Take a few flour tortillas, and cook them for a few seconds over an open flame.

Wrap all that stuff up in a tortilla with some of the aforementioned extras.

I also had left over tofu and veggies in a sandwich with hummus. Yum.


Make this if you are sick.

If you have a cold like I do right now, you gotta make this soup. It's just a simple variation of miso, but something about it is so nourishing and comforting. You just make the normal broth, then add soba noodles, tofu, spinach, scallions, CILANTRO and RED PEPPER FLAKES. I think it's the last two ingredients that make it special. The cilantro is refreshing and the red pepper will get your congestion moving. Gross.

The only change I made was that I used no-chicken broth instead of water. Made it a little heartier, and it's good for those hippy-dippy organic brands of miso paste that aren't salty enough.

Sunday, May 17, 2009

We had a picnic!

This was that weekend that spring came to NYC all at once in a crazy explosion of 95 degree weather in the middle of April. We celebrated by throwing together a picnic in Fort Greene Park.

In my humble opinion, picnic food should be easy. Easy to make, easy to eat, easy to carry, easy to keep in the sun without spoling. BUT IT ALSO MUST BE DELICIOUS! Is it possible? you may be wondering.

Well the answer is yes. Just take a look at this spread.


Clock wise from top:

I made black bean salad (recipe follows).
Hill made AWESOME brownies.
Alena brought some fruit.
Billy brought a refreshing celery blue cheese salad.
Joey brought "Summer Pasta", which is basically tortelini with basil, cherry tomatoes, garlic and olive oil. He taught me how to make this when we were in grad school together and having almost nightly dinner-making/study dates. This is sooo easy to throw together--just throw all the ingredients besides the pasta in a bowl, let sit so the flavors infuse the olive oil, and then toss with the pasta. You don't have to use tortelini--bowties work well if you want something less heavy.

Here is the recipe for my black bean salad. It is inspired by something I found on Epicurious, but I can't find the original recipe, and I've tweaked it so much anyway that we can just say I invented it.

Ingredients
Salad:
1 can black beans, rinsed and drained
1 can corn, drained
1 can heart of palm, drained and sliced into medallions
1 diced tomato
1 green pepper, chopped
1 red onion, finely chopped
1 bunch cilantro, chopped

1 avocado, sliced

Dressing:
1 clove garlic
Juice of 2 limes
Tb olive oil
tsp white vinegar
splash hot sauce if you want

E-Z:
Toss all the salad ingredients in a bowl. Then toss all the dressing ingredients into a smaller bowl and whisk together. Combine bowls. Toss that salad. Through some pretty avocado slices on top.

Done. Simple, refreshing, good. Look at how happy it made us:

Sunday, May 10, 2009

I made tofu parmesan!


When I first moved to Brooklyn, way back in 2005, my cousin Rachel sent a cookbook from a restaurant called The Grit, her favorite restaurant in Athens, Georgia. The Grit serves tons of vegetarian versions of traditional comfort food and is frequented by local legendary rockers the likes of Micheal Stipe. I think I made this recipe for the first dinner party I ever hosted at the apartment, and it was a total success. Except that I misread the recipe as calling for TWO POUNDS of mozzarella cheese instead of two cups! I don't think I actually ended up using that much because the pan would have been overflowing, but I still used a whole lot. 2 cups of mozz is plenty, as you can see in the mouth watering photo above.

I know what you may be thinking, especially you Italian food snobs-- tofu Parmesan sounds sacrilegious--like one of those vegetarian versions of dishes that just should not be messed with. It sounds like it would be soggy and weird. But it's not! It's delicious, cheesy goodness that will win over the biggest tofu skeptic. The trick is that the tofu is sauteed, THEN coated in breading and THEN baked before you put on the sauce and cheese and everything else.

I used Alena's method of squeezing out some of the water from the tofu by stacking some books on top of it and leaving it like that for a good 15 minutes. Works pretty well. One of the keys to making good tofu is getting rid of as much water as possible.

Ok here is the recipe, with a couple very minor adjustments in bold:

Tofu Parmesan from The Grit Restaurant Cookbook by Jessica Greene and Ted Hafer


Ingredients
3 (15 ounce) blocks tofu, extra firm
2 T olive oil
Soy sauce
2 large eggs, beaten
1 1/2 c freshly grated Parmesan, plus more for garnish
1 T chopped fresh parsely, plus more for garnish
2 1/2 c fine bread crumbs
1/2 t salt
1/8 t fresh ground black pepper
4 c marinara (I used Mama Vallese's homemade sauce, but I have made this before with store-bought. Ain't no shame in it.)
2 c shredded mozzerella
Chopped fresh or dried oregano, for garnish
A sprinkle of nutritional yeast
A couple garlic cloves

Preheat oven to 375. Grease a 9 x 13 baking pan or glass casserole dish.
Tear tofu chunks of various sizes. Add a thin layer of olive oil to a non-stick skillet and place over high heat. Chop up those garlic cloves and toss 'em in. Cover bottom of pan with tofu chunks and saute, tossiping often and sprinkling with soy sauce and nutritional yeast, which helps make it crispy.

Repeat with another small batch of tofu (I did about one and a half at a time--depends how big your skillet is) until all tofu is cooked in this manner. Drain if necessary and cool slightly. Place in a bowl with beaten eggs and toss together.
Blend 1 1/2 c Parmesan cheese, parsley, bread crumbs, salt and pepper. Add to tofu and toss together.
Pour 2 c marinara into prepared pan and spread evenly. Distribute tofu over sauce. Bake for 25 to 30 minutes or until tofu breading is very well browned.


Remove from oven and spread top with 2 c marinara sauce and mozzarella cheese. Garnish with remaining Parmesan cheese, parsley and oregano. Return to oven and bake 10 to 15 minutes until top is well browned.

Yields 8 servings.

Take another look at all that beautiful cheesiness:
YUM. Nothin' more you can say but Y U M.

Friday, April 24, 2009

I made some corn muffins...


Wow, I made these a long time ago. The occasion was a lovely brunch at Laura's house and I decided to make some muffins. They seem like a distant memory by now. BUT, it is never too late to revisit a good corn muffin recipe. These came to me via Smitten Kitchen (what else is new) but the original recipe is by Dorie Greenspan. Until recently, I did not know who Dorie Greenspan was, but now that I have been reading a fair share of food blogs, apparently Dorie is a pretty big deal.

I was drawn to these muffins because they were described on smitten kitchen as being not too sweet or heavy. I love muffins, but I don't love how dry and dense they can be sometimes. As I recall, a year or two ago I attempted to make banana muffins with wheat germ or flax seed meal or something healthy, and they came out really dry and heavy. They may have been healthy but they were totally disappointing. I was sad.

Luckily, these muffins are really fluffy and light. And although they are not too sweet, they still taste like MUFFINS and not CORNBREAD (even though you could still totally serve them with come chili if you wanted to.) I actually had fantasies of making chipotle lime butter to serve alongside these muffins, but did not have time. Instead, I attempted a blueberry butter, which was tasty. But these muffins don't need flavored butters or fancy spreadys to taste good. They are delicious served plain too.

Here's the recipe, which I followed basically as is. Go for it, make some muffins one Sunday morning. Bring them to a brunch or eat them while you watch a crappy movie on channel 11. Eat the leftovers Monday night with some of Sarah's sweet potato chili. It will be great.

Dorie Greenspan’s Corniest Corn Muffins
from "Baking from My Home to Yours"

Yield: 12 regular-sized muffins or 48 miniature ones

1 cup all-purpose flour
1 cup yellow cornmeal, preferably stone-ground
6 tablespoons granulated sugar
2 1/2 teaspoons baking powder
1/4 teaspoon baking soda
1/2 teaspoon salt
Pinch of freshly grated nutmeg (optional)
1 cup buttermilk
3 tablespoons unsalted butter, melted and cooled
3 tablespoons corn oil (I used olive oil)
1 large egg
1 large egg yolk
1 cup corn kernels (add up to 1/3 cup more if you’d like) - fresh, frozen or canned (in which case they should be drained and patted dry) - I used frozen, thawed and patted dry.

Center a rack in the oven and preheat the oven to 400 degrees F. Butter or spray the 12 molds in a regular-size muffin pan or fit the molds with paper muffin cups. Alternatively, use a silicone muffin pan, which needs neither greasing nor paper cups. Place the muffin pan on a baking sheet.

In a large bowl, whisk together the flour, cornmeal, sugar, baking powder, baking soda, salt and nutmeg, if you’re using it. In a large glass measuring cup or another bowl, whisk the buttermilk, melted butter, oil, egg and yolk together until well blended. Pour the liquid ingredients over the dry ingredients and, with the whisk or a rubber spatula, gently but quickly stir to blend. Don’t worry about being thorough - the batter will be lumpy, and that’s just the way it should be. Stir in the corn kernels. Divide the batter evenly among the muffin cups.

Bake for 15 to 18 minutes (12 minutes for minis), or until the tops are golden and a thin knife inserted into the center of the muffins comes out clean. Transfer the pan to a rack and cool for 5 minutes before carefully removing each muffin from its mold.

Tuesday, April 21, 2009

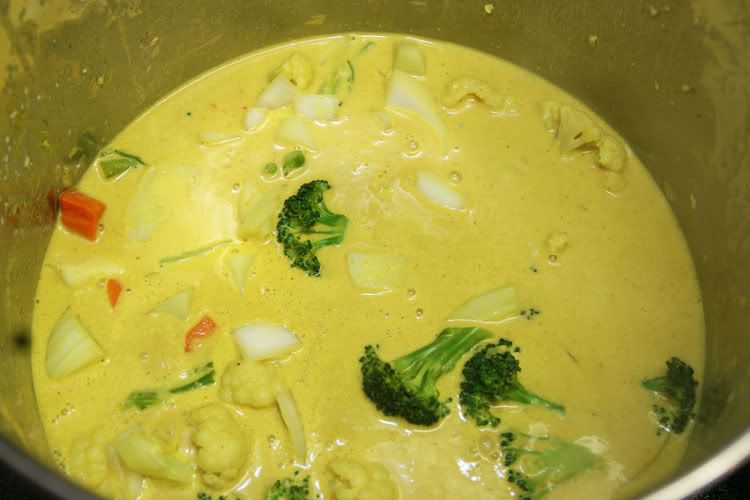
I Made Yellow Curry With Mixed Vegetables!

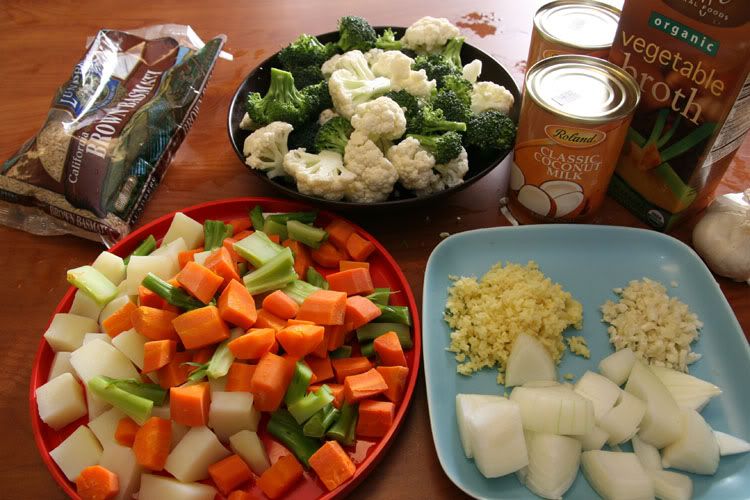
I made yellow curry with mixed vegetables! This is a fantastic, simple, vegan (yet hearty) dish. I got the recipe from Veg Cooking (a PETA website; click on link for concise instructions -- the following is rather elaborate because I have some personal suggestions). You will need:

    1 cup vegetable stock
    1 cup coconut milk
    1/2 cup 1-inch potato cubes, boiled (around one medium potato)
    1/2 cup 1-inch carrot cubes, boiled (one large carrot)
    1/2 cup small broccoli florets
    1/2 cup small cauliflower florets
    1 Tbsp. minced ginger
    1 tsp. sugar
    1 tsp. crushed garlic
    1/4 tsp. turmeric powder
    2 tsp. curry powder
    3 Tbsp. chili sauce
    Salt, to taste

First, boil some water in a medium pot. Also, prepare some basmati rice according to instructions on the package if you want to eat this curry over rice. Peel the carrots and potatoes. By the time you're done with that, the water will probably be boiling, so put in the potatoes. Remove when the cubes are nearly done (not all the way cooked, because you will be putting this into the pot later with all the curry goodness and you don't wan't to overcook). Do the same for the carrots (I do this separately because I feel like potatoes and carrots have different cooking times). Cut up the broccoli and cauliflower. If you don't want to waste the stem of the broccoli, cut it up like you would carrots, and cook it with the carrots. Mince the ginger and garlic. Optional: some coarsely chopped onions.

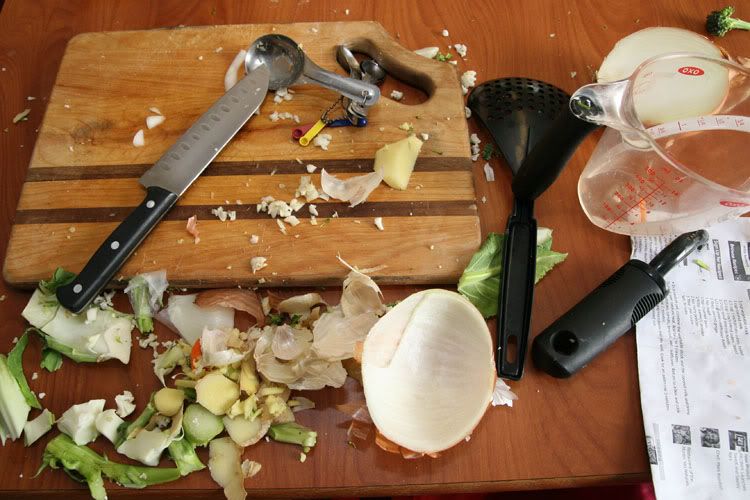
The mess...

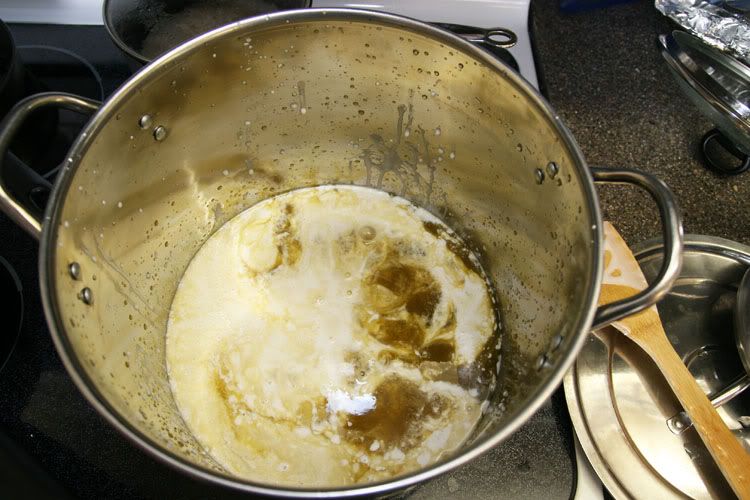
In a medium pot, combine the vegetable stock and the coconut milk and bring to a boil over medium heat. Boil for 2 to 3 minutes.

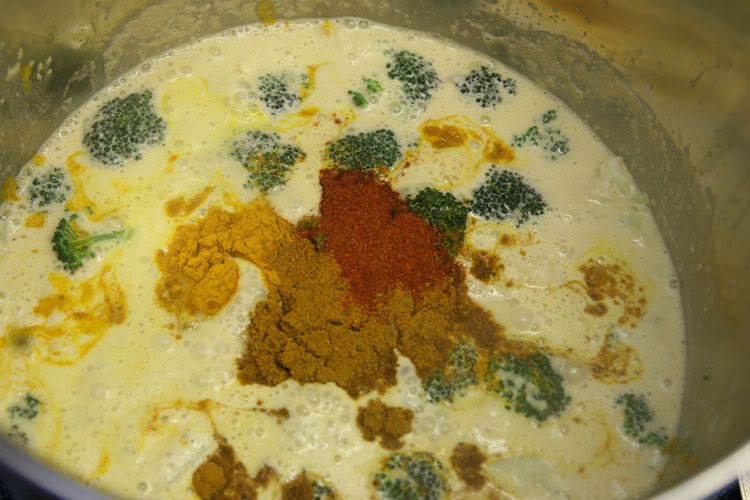
Colors not so appealing right now, but wait til you get to the spices.

As per the recipe: "Add the potatoes, carrots, broccoli, and cauliflower. Return to a boil and cook for an additional 2 minutes." I would personally add in the potatoes and carrots first, bring that to a boil, and then add the broccoli and cauliflower because those two cook a lot faster. But I think everything will overcook a bit anyway (especially because I let it simmer longer so it thickens a bit), so it probably doesn't matter too much in the end.

Add the remaining ingredients (SPICES!!!) and stir well. I never have chili sauce so I use 1/3 tsp Nigerian cayenne pepper instead (because that's what I have at dorm).

Cook for an additional 5 minutes, as per the recipe. I would simmer a bit longer though, so it would thicken a bit.

Serve hot with steamed rice.

My attempt at plating and food porn photography.

Makes 4 servings! A bit spicy.

Wednesday, April 15, 2009

I make pesto all the time and it is so easy and delicious!

I made pesto pasta last night and just had leftovers for lunch and it was SO delicious I feel like I should tell the world. EVERYBODY MAKE SOME PESTO! It is so easy and gratifying!!! You probably think that only your Italian friend's grandma can make perfect pesto, that it takes some secret magic touch. But it's not true! It's actually so simple and easy to make and pretty hard to screw up.

I am going to tell you my method. First let me tell something about me that you may already know from reading this blog:
I hate hate hate food processors. I don't know what is wrong with me, but I can never get them to work right, and it is so frustrating I can't take it. (Alena, I could really relate to your feeling of wanting to cry when your Cuisinart wouldn't work at first. In fact, I almost cried reading that post, I empathized so much.) BUT I LOVE my trusty hand blender, and have yet to find something you are supposed to make with a food processor that you can't make with a hand blender.

SO. Here's how I do it:

Put the following ingredients in a big sturdy bowl:
2-3 bunches fresh basil leaves. (Last night I also threw in a handful of arugula, which added some nice bitterness to the flavor. Sometime I would like to try making pesto with just arugula.)
About 1/2 cup pine nuts
4 garlic cloves, smashed (Feel free to increase or decrease depending on how much you like garlic. Although I think 4 cloves is on the garlicky-er end of the spectrum, so maybe you shouldn't put in too much more than that.)
1/2 cup extra virgin olive oil (I am not sure if this is exactly how much I put in. You want to put enough in to get everything wet enough so it will blend, but you don't want it too liquidy.)
about 3/4 cup freshly grated parmesan
The juice of one lemon (Not everybody does this, but I think it is essential to the flavor--adds a little sweetness to counter all the saltiness.)
Salt/Pepper to taste

Stick that hand blender in and blend away. Hand blenders are also called "immersion" blenders for a reason--you really have to bury it in your ingredients--if you hold it at the surface it will make a mess and not blend as well. You may have to stop a couple of times and scoop the stuff off the blades with your hands to make it blend better.

I like a thicker pesto. Some people like it to be really smooth and thin. Up to you.

Now look. You are done, and you only got one bowl dirty. And you can clean your hand blender by just taking the detachment off.

What are you gonna use your pesto for? Well, you could put in a pizza. You could make some pesto lasagna. You even put in on a sandwich. Make that sandwich a PANINI!!!

Or, you could just make the traditional pasta.

I like thin spaghetti with pesto. Here's something easy you can add to it that will make it EVEN MORE DELICIOUS:

Roasted grape tomatoes.

Here's how you do it:

Preheat the oven to about 425. Put a whole bunch of grape tomatoes on a baking sheet. Toss them with olive oil, salt and pepper. Pop those babies in and let them roast for about 15 minutes. They will burst and get wrinkled and slightly browned. Don't let them get too burnt--you want them to still be soft and juicy and tomato-y. (tomatoey?)

Throw them into the pasta.

Put tons of red pepper and more cheese on top.

This is a good summer dish because it has a lot of fresh ingredients and doesn't require much cooking. It's also just as good cold.

DO IT!

Sunday, April 12, 2009

"Well, SURELY this isn't gonna be disgusting." (The BEST baklava EVER) by Alena and Faryl

The day started on an UP note, Alena and Faryl (us), got Chipotle on our way to pick up Alena's FREE Cuisinart food processor!!!! And POST processor pick-up; guess what?! We were gonna make BAKLAVA!
We chose between two very competent recipes and decided on the one from Epicurious.


We wrote it on a piece of pape so we didn't have to move the computer.
(It looks like E.T. is helping to hold it for us.)

Middle Eastern Nut-Filled Multilayered Pastry (Baklava)

Ingredients:

(We cut the amounts in this recipe in half.)

Syrup:

* 3 cups sugar, or 2 cups sugar and 1 cup honey
* 1 1/2 cups water
* 2 tablespoons lemon juice
* 2 tablespoons light corn syrup (optional) - We left it out!
* 2 (3-inch) sticks cinnamon (optional) - We put it in!
* 4 to 6 whole cloves, or 1/2 teaspoon ground cardamom (optional)- We left it out!


Filling:

* 1 pound blanched almonds, pistachios, walnuts, or any combination, finely chopped or coarsely ground (about 4 cups)
* 1/4 cup sugar
* 1 to 2 teaspoons ground cinnamon
* 1/4 teaspoon ground cloves or cardamom (optional)


* 1 pound (about 24 sheets) phyllo dough
* About 1 cup (2 sticks) melted butter
or vegetable oil - (go with butter, seriously.)

SO. With the newly acquired CUISINART we thought to ourselves, let's fire this baby up and grind up some pistachios, walnuts and almonds! We lifted the heavy thing out of the box. (Did I mention we carried it from 111th street to 92nd?) To our dismay, the Cuisinart in the box did not resemble the shiny, stainless steel model pictured above. In size and shape, yes, the similarities were there, but this guy was probably circa 1978 - complete with some very stylish (for the time) tan and brown plastic attachments. AESTHETICS ASIDE -- It looked sturdy and functional. Everything a Cuisinart should be. We assembled it, plugged it in and....


nothing happened. The shiny metal blade remained inert. The machine was still.

Hell no, we thought. We carried this thing in our little arms all the way from 111th street! It HAS to work!

We moved some pieces around, unplugged, plugged back in, tried again. Nada.

I (alena) wanted to cry a little. BUT - didn't. We found that Nick's coffee grinder served as an excellent nut grinder too. We moved on:

1. To make the syrup: Stir the sugar, water, lemon juice, and if using, the corn syrup, cinnamon sticks, and/or cloves over low heat until the sugar dissolves, about 5 minutes. Stop stirring, increase the heat to medium, and cook until the mixture is slightly syrupy, about 5 minutes (it will register 225 degrees on a candy thermometer). Discard the cinnamon sticks and whole cloves. Let cool.

2. To make the filling: Combine all the filling ingredients.

3. Preheat the oven to 350 degrees. Grease a 12-by-9-inch or 13-by-9-inch baking pan or 15-by-10-inch jelly roll pan.

4. Place a sheet of phyllo in the prepared pan and lightly brush with butter. Repeat with 7 more sheets. Spread with half of the filling. Top with 8 more sheets, brushing each with butter. Use any torn sheets in the middle layer. Spread with the remaining nut mixture and end with a top layer of 8 sheets, continuing to brush each with butter. Trim any overhanging edges.

5. Using a sharp knife, cut 6 equal lengthwise strips (about 1 3/4 inches wide) through the top layer of pastry. Make 1 1/2-inch-wide diagonal cuts across the strips to form diamond shapes.

6. Just before baking, lightly sprinkle the top of the pastry with cold water. This inhibits the pastry from curling. Bake for 20 minutes. Reduce the heat to 300 degrees and bake until golden brown, about 15 additional minutes.

7. Cut through the scored lines. Drizzle the cooled syrup slowly over the hot baklava and let cool for at least 4 hours. Cover and store at room temperature for up to 1 week. If the baklava dries out while being stored, drizzle with a little additional hot syrup.


Ground nuts!

Syrup!

Faryl's Aunt Rae is a famous Bakalva maker and she has an instructional DVD that shows how to cut it special... but she (I) forgot.

The recipe says to chill the Baklava for 4 hours. I would like to say "F THAT". We waited about 10 minutes before diving into that pastry and it was DELICIOUS. Faryl's attitude changed from one of apprehension and skeptical hope ("Well, surely this isn't gonna be disgusting,") to proclaiming it "the best baklava EVER". I (Alena) would have to agree! Make it! You will eat it all out of the pan without even waiting for it to cool.

And as for the Cuisinart?

Nick arrived home, switched around one part, and BOOM.

IT WORKED. SUCCESS ALL AROUND.

(Thanks Nick.)


Yo, we made that shit.

Monday, March 23, 2009

We made polenta pizza!

(This is a real time conversation between Sarah and Alena, the cooks behind this tasty dish.)

Alena: Hey Sarah. So, do you remember how we came across the recipe for this polenta pizza? I know I do.
Sarah: Hey girl. I think I recall. Wasn't it that Bittman article telling you to "Rethink your Breakfast"? Or something like that? The one that misguided you into making savory oatmeal?
Alena: That's the article. All I know is, I am never putting soy sauce in oatmeal ever again. The polenta pizza however, is something I would definitely make again (and did, in fact, the night after we made this one !) Let's tell 'em all how we began the recipe.
Sarah: This is the Bittman Polenta Method. His version of the pizza had spinach and pancetta, but we changed it up to make it vegetarian. But you can put anything you want on this pizza!

Polenta crust:
1/4 cup olive oil
1/2 cup whole milk
salt
1 cup coarse cornmeal (we used instant)

Topping:
Mama Vallese's sauce
smoked mozzarella
4 shallots, sliced thinly
bunch a spinach
couple cloves garlic
parmesan

Here are Bitt's instructions for the crust:

1. Heat oven to 450 degrees; brush a layer of olive oil on a pizza pan or cookie sheet. In a medium saucepan over medium-high heat, combine milk with 2 1/2 cups water and a large pinch of salt. Bring just about to a boil, reduce heat to medium, and add cornmeal in a steady stream, whisking all the while to prevent lumps from forming. Turn heat to low and simmer, whisking frequently, until thick, 10 or 15 minutes. If mixture becomes too thick, whisk in a bit more water; you want a consistency approaching thick oatmeal.

2. Stir 1 tablespoon oil into cooked cornmeal (polenta). Spoon it onto prepared pan, working quickly so polenta does not stiffen; spread it evenly to a thickness of about 1/2 inch all over. Sprinkle with salt and pepper, cover baking sheet with plastic wrap and put it in refrigerator until it is firm, an hour or more (you can refrigerate polenta overnight if you prefer).

3. Put polenta in oven and bake for 25 to 30 minutes, or until it begins to brown and crisp on edges. Here's where we take over.

4. Heat some olive oil in a skillet. Add some garlic and those shallots. Brown em real good. Toss in that spinach. You don't even need to chop it. Just tear off those stems. Cook just for a few minutes.

Now you are ready to assemble.

Spread on that sauce.
Slice up that cheese and put it on.
Distribute those veggies.
Pop that shit in the oven.
Just for like five. Til the cheese melts. That's all you need.

Alena: This is the part I like the best. We got out some plates and put HALF the pie onto mine and HALF onto Sarah's. Actually just kidding, we left like a 1/4 of the pie for Hillary to try, except I think we ended up eating that too. Sorry Hill. We will make another one for all of us soon.
Sarah: This was so good because the polenta crust is spongy but also crispy and is just so delicious in contrast to the smokey mozz and the sweet shallots. Plus it's healthier and feels lighter than regular pizza.
Alena: It's true. In fact, I remember that after we cleaned our plates, we commented that we did not feel as uncomfortably full as we often do when eating regular pizza.

Sarah: That's true. We did make that very comment.
Alena: If only the episode of Gossip Girl that we watched while eating was as good
as the dinner itself, you know?
Sarah: I know right. What was up with that Age of Innocence motif. It's like, JUST IN CASE YOU DIDN'T REALIZE, THIS SHOW IS TRYING TO BE LIKE EDITH WHARTON OR JANE AUSTEN IN ITS IRONIC PORTRAYAL OF NEW YORK HIGH SOCIETY. except it is a show on the cw (i almost said "the wb" LOL).
Alena: Whew, I am so glad you didn't call it the WB, how embarrassing.