Sunday, November 29, 2009

I made my go-to quiche


It almost feels silly to post a quiche recipe on this blog. All of you who contribute to this blog have probably made quiche at one point or another, because it is so easy to make and so tasty, and you probably have your own go-to recipes for it. Well, this is mine! But, I figured, since I took some photos of it, why not share it with you all. Maybe one day you will want to make a quiche and try this method out.

One reason that I like this particular recipe is because compared to many other quiche recipes I have seen, this is slightly healthier. No cream or cream cheese or other heavy foods. Just some milk and a bit of Parmesan (and in this case, goat cheese!) I also like using a combo of parm and swiss.

Quiche is a great thing to bring to a potluck or a brunch, but I actually made this quiche a few weeks ago for no reason at all. I just felt like cooking something easy and delicious. So I did!

Here you go:
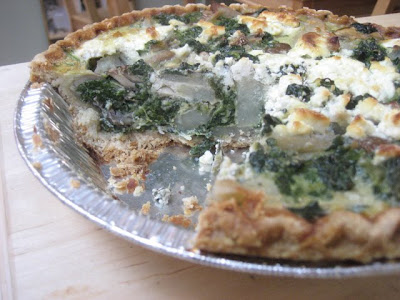


This recipe is modified from one by Sara Moulten, via the Food Network website.

Ingredients
1 frozen prepared pie shell (or of course feel free to make your own! I have never done that, but I bet a lot of you have, so totally use your favorite recipe, if you'd like.)
3 tablespoons extra-virgin olive oil
3 chopped shallots or 1 medium chopped onion (or a mixture of both!)
1 russet potato, peeled and sliced thinly
3 garlic cloves, minced
1 (10-ounce) package frozen chopped spinach - thawed, excess liquid drained. (Draining out all the liquid is key! You don't want a watery quiche.)
1 pound cremini mushrooms, chopped (I think a pound is maybe about a dozen or so mushrooms?)
3 large eggs
1/4 cup grated Parmesan
1 cup milk
2/3 cup (3 ounces) crumbled goat cheese


Directions

Preheat oven to 350 degrees F.

Blind bake the crust: Line the pie shell with aluminum foil and weigh it with pie weights or beans (I actually never weigh it down, and it's fine. If the crust puffs up a bit, just poke a few holes in it with a fork and it will deflate).

Bake for 15 to 20 minutes until light golden brown.

Increase oven temperature to 375 degrees F.

In a large skillet, heat oil over moderate heat. Add onion or shallots and cook until softened. Turn up heat to moderately high. Add garlic, mushrooms, and potato and cook until the mushrooms begin to brown and release some of their moisture. Add spinach and continue cooking until it is heated through. Drain off any excess liquid.

Beat the eggs in a bowl and add the Parmesan, half the goat cheese and milk. Add the spinach mixture and pour into the pie shell. Sprinkle remaining goat cheese on top. Bake on a sheet pan in the middle of the oven for 30 to 35 minutes or until just set.


Saturday, November 21, 2009

We Made Pumpkin Cashew Curry ON HALLOWEEN!

On Halloween this year, Alena, Martha and I (Sarah G.) had the idea to carve a jack-o-lantern AND make something with actual, real, not-from-a-can pumpkin. (Take a look at our aquatic jack-o-lantern, pictured above!) Originally, I had envisioned that a single pumpkin could serve both purposes, but DUH--the pumpkin meat is attached to the skin, so a second pumpkin was needed.

Cooking with pumpkin isn't that different from cooking with any other kind of winter squash. Peeling it is a pain in the ass, but once you're over that hurdle, it's pretty easy. Also, I think pumpkin is tougher than other kinds of winter squash, so you have make sure to cook it until it's soft enough.


When Hill, Martha, Annie and I were in Cambodia, we had some really great pumpkin dishes. I remember one had pan fried tofu with pumpkin, scallions and ginger. There were also some amazing pumpkin curries. I've thought about making similar dishes for the past couple years, so we searched the web and found this recipe on Epicurious.

Creamy Pumpkin and Cashew Curry
Bon Appetite October 2009

  • 2 tablespoons vegetable oil, divided
  • 4 1/2 cups 3/4-inch cubes peeled seeded sugar pumpkin or butternut squash (from about one 1 3/4-pound whole pumpkin)
  • 1/2 teaspoon black mustard seeds*
  • 8 curry leaves** (Just used regular old curry powder.)
  • 2 small red onions, cut into 1/3-inch wedges
  • 2 garlic cloves, chopped
  • 1 tablespoon finely grated peeled fresh ginger
  • 3 dried chiles de árbol*** (Couldn't find this--just used a ton of cayenne.)
  • 3/4 cup unsalted roasted cashews
  • 1 teaspoon ground turmeric
  • 1/2 teaspoon ground cumin
  • 11/2 cups canned unsweetened coconut milk****
  • 1 cup coconut cream
  • 1/2 cup coarsely chopped cilantro plus additional for garnish (We also garnished with scallions and sliced almonds.)
  • 1 tablespoon fresh lime juice
  • Steamed basmati rice


Heat 1 tablespoon oil in large skillet over medium heat. Add pumpkin and cook until golden, stirring occasionally, 8 to 10 minutes. Transfer to bowl.

Add 1 tablespoon oil to same skillet. Add mustard seeds and curry leaves; cook until seeds pop and leaves sizzle, 30 seconds. Add onions, garlic, and ginger. Sauté until onions are golden, 4 minutes. Add chiles, cashews, turmeric, and cumin; stir-fry 1 minute. Add coconut milk and coconut cream. Increase heat to mediumhigh. Boil until thickened, 2 minutes. Return pumpkin to pan; reduce heat to medium. Simmer until pumpkin is tender, 4 minutes. Stir in 1/2 cup cilantro and lime juice. Spoon over rice; garnish with additional cilantro.

* Sold at specialty foods stores, Indian and Asian markets, and adrianascaravan.com. If unavailable, use brown mustard seeds.

** Also known as kari patta; available at Indian markets.

*** Thin, red, hot three-inch-long chiles; available at some supermarkets and at specialty foods stores and Latin markets.

**** Available at supermarkets and at Indian, Southeast Asian, and Latin markets.


It was the perfect Halloween meal. Rich, spicy, sweet, yummy, SPOOKY!!! Not really. But still.

Friday, November 13, 2009

I made a hearty vegan brunch!

I made a hearty vegan brunch (salivate at the above picture) consisting of scrambled tofu (recipe will follow), fake ham from some Asian brand of Buddhist products bought from Flushing, LightLife Gimme Lean ground-style "meat," and rustic bread with Smart Balance.

I got the recipe for the scrambled tofu from Ira Chandra Moskowitz's Vegan with a Vengance:
1 tbsp olive oil
1 medium-sized yellow onion, chopped into 1/2-inch chunks
2 cups thinly sliced cremini mushrooms
2 to 3 cloves garlic, minced
1 pound extra-firm tofu, drained
1/4 cup nutritional yeast
juice of 1/2 lemon
1 carrot, peeled (optional, grate it in at the end, mostly for color)
For spice blend
2 tsp ground cumin
1 tsp dried thyme, crushed wiht your fingers
1 tsp ground paprika
1/2 tsp ground turmeric
1 tsp salt
Heat the oil in a skillet over medium-high heat. Saute the onions for 3 minutes, until softened; add the mushrooms, saute for 5 minutes; add the garlic, saute for 2 minutes. Add teh spice blend and mix it up for 15 seconds or so. Add 1/4 cup of water to deglaze the pan, scraping the bottom to get all the garlic and spices.
Crumble in the tofu and mix well. Don't crush the tofu, just kind of lift it and mix it around. You want it to remain chunky. Let cook for about 15 minutes, stirring occasionally and adding splashes of water if necessary to keep it from sticking too much. Lower the heat a bit if you find that the tofu is sticking. Add the lemon juice. Add the nutritional yeast and mix it up. If the mixture is sticking to the pan, add splashes of water. The moistness really depends on how much water the tofu was retaining before you added it.
Grate the carrot into the tofu mixture and fold. Serve with guacamole and salsa and potatoes and toast and tempeh bacon.
For the "sausages," I took the LightLife Gimme Lean pack of "ground meat" (I find myself making the quote gestures whenever I talk about fake meats, by the way), and rolled it into shape with my hands. This product has great texture and great shape-ability for making un-meatballs, etc. but it is kinda sticky. Sauteed it in a pan with hot olive oil until browned. Did the same with the sliced fake ham. Serve everything with toast and Smart Balance.

I had a glass of Silk soy milk to complete my meal.

Perfect vegan hearty brunch!

Wednesday, November 11, 2009

I Made a Coconut Water Cocktail (from Canada) !


(Disclaimer: This recipe has been sitting in the drafts folder for months! I don't know why. Now it is fall and it seems silly to drink cold, fruity cocktails. I suppose that is OK. You can just crank up the heat and pretend it is summer if you make this.)

SO, here is what I wrote a while back:

Over the summer my parents spent a few weeks in Vancouver, BC. When they came back, my mom was telling me about this cocktail that she had at a really good Thai restaurant there, Maenam, that combined coconut water, vodka, ginger, and chile. It sounded good to me, so one night when I was hanging out at my parents house, I did some internet searching to see if the recipe could be found anywhere. I didn't find the exact recipe, but I found something close and decided to try my hand at being a mixologist.

Of course, it wasn't until after I made the cocktail that I had the idea to see if the recipe was posted on the restaurant's website.

It was! Here is how it is described on the Maenam menu:

Siam sun ray:
wyborowa vodka, lime,
chile and ginger infused toasted coconut juice, soda

"Toasted coconut juice" is a new thing to me. I did more research. I think it may be this. "Roasted" is sorta like "toasted".

(Another disclaimer: I actually found a can of this stuff in Woodside, Queens recently. It was definitely toasty and SO SWEET. Maybe too sweet on it's own, but I can see it being good mixed with Vodka. Seek it out if you want to!)


In any case, roasted/toasted aside, here is what I used to make the drink.

2 parts coconut water
1 part vodka
juice of approx. 1 lime (to taste)
agave nectar (or simple syrup, to taste) - Though if you use the "roasted coconut juice, it will definitely be sweet enough.
small piece of ginger
small piece of a mild chile pepper (Optional).
soda water (Optional).

To prepare:
In a glass (or cocktail shaker if you have one), muddle the ginger (and chile, if using) into the coconut water. Add lime juice, agave or simple syrup (if using) and vodka. If using a cocktail shaker, add ice, cover and shake. Strain into a chilled glass. (If no cocktail shaker, simply remove the ginger and strain into a chilled glass). Add more lime juice/sweetener if needed, or a splash of soda water for some fizz.


We ate this with some fruit! I also put a piece of pineapple in my drink, because it tasted good.


That is my mom holding the drink. She said it was different than the one she had at the restaurant, but still good. I will definitely make this again. And if I ever go to Vancouver, I can try the real thing.

Friday, October 9, 2009

We Made Mushroom Bourguignon


Hello everyone. Have we got a fall/winter dish for you. Last weekend Hillary, Sarah, Laura and I collaborated on the creation of a delicious Portobello Mushroom Bourguignon. The dish is actually pretty easy to make. Just a bit of chopping, throwing this and that into a big pot, and then all you have to do is let it all simmer on the oven while you snack on bread and butter. Even if you are not a vegetarian the dish is easier and cheaper to make than beef bourguignon and just as rich and satisfying. Hill also made an amazing chocolate mousse for dessert which will probably be posted soon!


Mushroom Bourguignon (From Smitten Kitchen)

Serves 4

2 tablespoons olive oil
2 tablespoons butter, softened
2 pounds portobello mushrooms, in 1/4-inch slices (save the stems for another use) (you can use cremini instead, as well)
1/2 carrot, finely diced
1 small yellow onion, finely diced
2 cloves garlic, minced
1 cup full-bodied red wine
2 cups beef or vegetable broth (beef broth is traditional but vegetable to make it vegetarian; it works with either)
2 tablespoons tomato paste
1 teaspoon fresh thyme leaves (1/2 teaspoon dried)
1 1/2 tablespoons all-purpose flour
1 cup pearl onions, peeled (thawed if frozen)
Egg noodles, for serving
Sour cream and chopped chives or parsley, for garnish (optional) - You can also use greek yogurt like us.

Heat the one tablespoon of the olive oil and one tablespoon of butter in a medium Dutch oven or heavy sauce pan over high heat. Sear the mushrooms until they begin to darken, but not yet release any liquid — about three or four minutes. Remove them from pan.

Lower the flame to medium and add the second tablespoon of olive oil. Toss the carrots, onions, thyme, a few good pinches of salt and a several grinds of black pepper into the pan and cook for 10, stirring occasionally, until the onions are lightly browned. Add the garlic and cook for just one more minute.

Add the wine to the pot, scraping any stuck bits off the bottom, then turn the heat all the way up and reduce it by half. Stir in the tomato paste and the broth. Add back the mushrooms with any juices that have collected and once the liquid has boiled, reduce the temperature so it simmers for 20 minutes, or until mushrooms are very tender. Add the pearl onions and simmer for five minutes more.


Combine remaining butter and the flour with a fork until combined; stir it into the stew. Lower the heat and simmer for 10 more minutes. If the sauce is too thin, boil it down to reduce to the right consistency. Season to taste.

To serve, spoon the stew over a bowl of egg noodles, dollop with sour cream or greek yogurt (optional) and sprinkle with chives or parsley.


Wednesday, September 16, 2009

I made beer braised pork loin


So yesterday I got it into my head that I wanted to make some kind of slow-roasted meat. I looked around online today and settled on this recipe: http://www.porkroastrecipe.net/PorkRoast/BeerBraisedPorkRoast.htm

It was the simplest recipe of all the ones I looked at, and involved cooking with beer, which I've never done before. So I bought a 2.5 lb pork loin at the grocery store, which was the largest they had (and more than enough for 2 people. I have leftovers for 2 days).

This is how I did it:
1 (2-3 pound) Pork Loin Roast
1/4 cup Vegetable Oil
2 medium Onions, diced
Salt
Pepper
2 (15 ounce) cans or bottles Guinness Stout or Dark Beer

I seasoned the pork with salt and pepper, then browned it on the stove in the vegetable oil. Once that was browned on all four sides (took about 15 minutes) I set it aside on a plate. Then I threw two small diced onions into the pot and sauteed them til they were soft, about 10 minutes. Then I put the loin back in the pot with the onions, poured two 15 ounce cans of Guinness around it, covered it, and brought it to a boil. Once it began to boil I turned it down to low and simmered it for about an hour. In the end I overcooked the pork slightly. By the time I checked the temperature it was 160 degrees. I read in my "Cooking Meat" cookbook that I should have taken it out of the pot at about 145-147 degrees as the meat will raise to about 155 once its resting. It was a tad on the dry side, but still very good.

I also made mashed potatoes and oven roasted carrots and turnips. After I took the loin out of the pot, I put it on a cutting board and tented it with aluminum foil. As I cooked the vegetables I brought the beer and onion broth up to a boil and let it slowly cook down. I didn't have the patience to make an actual reduction sauce or gravy at this point (I'd been in the kitchen for about 2 hours), but the broth and onions was still tasty spooned over the potatoes and meat.

The carrots and turnips I coated in oil and salt and pepper and baked on a baking sheet at 400 degrees for about 20-25 minutes. For the mashed potatoes I used 6 while potatoes, a healthy amount of butter, and hot milk. There's nothing worse than luke warm mashed potatoes.

Monday, September 14, 2009

I made Heirloom Tomato Gazpacho!


Alison was having a dinner party last Saturday and I was trying to figure out what to bring. Something tasty, easy to transport, and seasonal, I thought to myself. Then I realized that I had been excited to make gazpacho all summer long but had never found the time. Well, the time has come, I thought to myself again.

I decided to go with a traditional gazpacho and followed this recipe exactly. It was so easy!!

Classic Andalusian Gazpacho
Adapted from El Faro, Cádiz, Spain

1 (2-inch-long) piece baguette, crust discarded
2 garlic cloves
2 teaspoons salt
2 tablespoons Sherry vinegar (preferably "reserva"), or to taste - (I did not use "Reserva" vinegar, wouldn't sweat it.)
1 teaspoon sugar
1/2 teaspoon ground cumin (optional) - I say go for it.
2 1/2 lb ripe tomatoes, cored and quartered (As you can see I used 4 large heirloom tomatoes and one smaller guy.)
1/2 cup mild extra-virgin olive oil (preferably Andalusian hojiblanca) - Again, just used my standard olive oil. Why not?

Garnish: Finely chopped red and green bell pepper (I also used Persian cucumber and a bit of jalapeno. I think some very finely chopped red onion could be good too.)

Preparation:

Soak bread in 1/2 cup water 1 minute, then squeeze dry, discarding soaking water.


Mash garlic to a paste with salt using a mortar and pestle (or mince and mash with a large knife).


My attempt at making the paste with a knife. Five minutes after I finished, I found a mortar and pestle in my cabinet that I had no idea existed. Ah well. Next time I guess. It would definitely be easier that way.


Blend garlic paste, bread, 2 tablespoons vinegar, sugar, cumin, and half of tomatoes in a food processor (I used the trusty HAND BLENDER!) until tomatoes are very finely chopped.


The first batch, waiting to be blended.


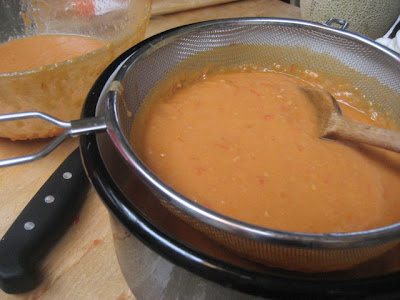
Add remaining tomatoes with motor running and, when very finely chopped, gradually add oil in a slow stream, blending until as smooth as possible, about 1 minute. Throwing that yellow tomato into the mix made the soup a crazy orange color!


Force soup through a sieve into a bowl, pressing firmly on solids. Discard solids.


Look at all the seeds and peels I strained out!


Strained soup, ready to chill.

Transfer to a glass container and chill, covered, until cold, about 3 hours. Season with salt and vinegar before serving.


Gazpacho to go!


I don't have any photos of the final product, but we served the soup in little ceramic mugs with some of the garnish on top, and it looked pretty cute. I was really proud of this soup. The tomatoes were so flavorful, and the soup tasted fresh and bright. Straining it makes the texture so smooth and creamy and it actually feels a little bit fancy, even though it is really simple. I want to make it over and over while there are still delicious tomatoes to be found. You should too.

Tuesday, September 1, 2009

I made Blueberry Boy Bait!

This is a dessert I made last week when I got together with Hillary, Alena, and Monique for Burrito Friday. It's a funny name for a cake, and no, I haven't caught any boys with it. Yet. If something WERE to lure boys in however, it might be this cake. It's VERY tasty, and surprisingly light given the two sticks of butter in it. I found the recipe, unsurprisingly, on Smitten Kitchen, and she got it from Cook's Country. The original recipe was actually created by a 15 year old girl in 1954 for the Pillsbury Bake Off. All in all, an excellent dessert and also good as breakfast the next day. My notes are in bold below.

Serves 12, generously

2 cups plus 1 teaspoon all-purpose flour (I swapped out 1/2 cup of the regular flour for whole wheat -- makes it healthy!)
1 tablespoon baking powder (I thought this seemed like a lot, but it worked out fine)
1 teaspoon table salt
16 tablespoons unsalted butter (2 sticks), softened
3/4 cup packed light brown sugar
1/2 cup granulated sugar
3 large eggs
1 cup whole milk (though buttermilk, which was all I had on hand, worked just great) I used buttermilk as well!
1/2 cup blueberries, fresh or frozen (if frozen, do not defrost first as it tends to muddle in the batter)

Topping
1/2 cup blueberries, fresh or frozen (do not defrost)
1/4 cup granulated sugar
1/2 teaspoon ground cinnamon (nutmeg might also be a nice addition)

The Bait! Cut and ready for friends to enjoy.

For the cake: Adjust oven rack to middle position and heat oven to 350 degrees. Grease and flour 13 by 9-inch baking pan.

Whisk two cups flour, baking powder, and salt together in medium bowl. With electric mixer, beat butter and sugars on medium-high speed until fluffy, about two minutes. Add eggs, one at a time, beating until just incorporated and scraping down bowl. Reduce speed to medium and beat in one-third of flour mixture until incorporated; beat in half of milk. Beat in half of remaining flour mixture, then remaining milk, and finally remaining flour mixture. Toss blueberries with remaining one teaspoon flour. Using rubber spatula, gently fold in blueberries. Spread batter into prepared pan.

For the topping:
Scatter blueberries over top of batter. Stir sugar and cinnamon together in small bowl and sprinkle over batter. Bake until toothpick inserted in center of cake comes out clean, 45 to 50 minutes. Cool in pan 20 minutes, then turn out and place on serving platter (topping side up). Serve warm or at room temperature. (Cake can be stored in airtight container at room temperature up to 3 days.)

Sunday, August 23, 2009

I Made Swisschard-akopita


Good Day,

Last night I scrambled to make a good impression on all my new classmates by bringing a delicious dish to a potluck reading. My original plan was to make dumplings (which I have never done before, but always admired Sarah for) but none of my New Mexico grocery stores had the dumpling dough. I ended up leaving with Phyllo dough, and made a last minute switch to do Swisschard-akopita which worked out great!

As a kid I really hated Quiche and I think this would be a good option for any Quiche haters out there if you're looking to little by little get over your Quiche disgust (for me it's the texture! Barf!) Because this is densely packed with greens the eggyness just fades away. Also if you have pie crust phobia this dish might be a good alternative.

Spanakopita is a traditional savory greek pastry, which traditionally probably isn't so good for you (tons-o-butter+cheese), and the greeks normally eat it as a little snack for that reason. With slight modifications I think this dish is filling healthy and great with just a salad as green and hearty meal. I read somewhere that during high holidays the greeks often make this without any dairy, which I would also like to try, and for any Vegans out there would be a great option!


I got home and took a look at a recipe...Below is the recipe, and my modifications:

Ina Garten's Spinach Pie
2 yellow onions (I used 2 red onion, which made things nice and sweet)
2 teaspoons olive oil
2 teaspoons salt (I actually omitted this because cheese is so salty)
2 teaspoons pepper
3 (10 ounce) packages of frozen chopped spinach defrosted (I used 1 large bunch of colored brights Swiss Chard which I bought raw)
6 eggs
2 teaspoons nutmeg
6 cloves garlic minced (the recipe did not call for any garlic, but I love it)
1/2 cup parmesan cheese (I think I used slightly less)
3 Tablespoons dry bread crumbs (Omitted)
1/2 pound good feta
1/2 cup pine nuts (I used chopped walnuts)
1/4 pound butter for the phyllo dough (I used a 1/4 cup of olive oil instead and it worked great)
6 sheets phyllo dough, defrosted (I used 8)

Preheat Oven to 375 degrees

1) Chop 2 onions and saute them in 1 TBS olive oil until translucent and a bit brown, 8-10 minutes, and set them aside to cool a bit, add ground pepper.

2) Cook down your chopped greens in a TBS of olive oil. I used Swiss Chard and it worked wonderfully. Do not over cook them as they will spend ample time in the oven, just cook them down enough to where they are a bit tender, but their cores are still crunchy. 6-8 minutes or so. This made me think I'd like to make this with Kale or even Mustard greens at some point, and it seems like a good way to introduce your children to exotic greens that they normally wouldn't tolerate. If you are using the frozen spinach drain as much water as possible from it.

3) Combine your greens (cooked, or defrosted and drained) with the onions, 6 eggs (beaten), nutmeg, parmesan, minced garlic, feta, and nuts (pine, walnuts, or both!)

4) grease a pie pan, or any pan really, but i find the rounder the pan the better the top looks when you fold it over. gently handle the Phyllo dough, unrolling it, and placing the first sheet in the pan. Let the edges of the phyllo dough hang over the pan. Then gently brush on olive oil (with a brush, or your fingers) covering the whole bottom of the pan where the Phyllo Dough touches working your way out to the edges of the dough that hangs. Continue layering phyllo dough 6 sheets deep brushing olive oil on each layer.

5) Once you have 6 layers in your pan go ahead and pour your filling in. Depending on the size of you pan you may have enough filling for 2 pies.

6) lift the edges of the phyllo dough up and over the filling (It's okay if it doesn't cover the filling completely you can put 2 extra sheets on top to seal your pie.)

7) bake in the oven for an hour. You could bake it for 45 minutes if you're short on time, but the full hour really lets all the flavors set, and gives you a pie you can cut well.

8)Let the pie cool at room temp before serving, and refrigerate leftovers they are great cold or warmed up!


Opa!

Tuesday, August 18, 2009

I made that olive oil granola that everyone is talking about!


Ever since this granola recipe was published in the NY Times a few weeks ago I feel like I can't read a food blog without coming across a wild endorsement. My interest was already piqued when I read that the recipe contained one of my favorite flavor combos, savory and sweet. I have never seen a granola recipe call for kosher salt before, and I was intrigued. I finally decided to make it on a Sunday morning 2 weekends ago, and I have been enjoying is ever since. I actually just polished off the last of it this morning. Time to make more !


This is the original recipe with my notes/substitutions:

(The ingredients are pretty flexible. As long as you've got the right balance of oats/sweeteners/oil, you can really add pretty much anything.)

3 cups old-fashioned rolled oats

1 1/2 cups raw pistachios, hulled (Omitted)

1 cup raw pumpkin seeds, hulled (Only used about 1/2 a cup)

1 cup coconut chips (Omitted)

3/4 cup pure maple syrup

1/2 cup extra virgin olive oil

1/2 cup packed light brown sugar (Used a bit less.)

1 teaspoon kosher salt (I actually found the saltiness too subtle. But I REALLY like salt. If you also really like salt, I recommend adding another teaspoon. )

1/2 teaspoon ground cinnamon (I recommend adding extra if not using cardamom.)

1/2 teaspoon ground cardamom (Omitted)

3/4 cup chopped dried apricots (Omitted)

ADDED:
Blanched whole almonds (1/2 cup)
Sunflower Seeds (1/2 cup)
Sesame Seeds (1/4 cup)
1/2 cup ground flaxseed (1/2 cup)
Dried cranberries (1/2 cup)


Fresh ricotta, for serving (optional)

Fresh berries, for serving (optional).

1. Preheat oven to 300 degrees. In a large bowl, combine oats, your selection of nuts, maple syrup, olive oil, brown sugar, salt, cinnamon and cardamom (if using). Spread mixture on a rimmed baking sheet in an even layer and bake for 45 minutes, stirring every 10 minutes, until golden brown and well toasted.

2. Transfer granola to a large bowl and add apricots (if using), tossing to combine. Serve with ricotta and fruit, if desired.


I think I understand why people are so crazy over the granola. As the Times article says, the olive oil gives the granola a unique, somewhat bitter and fruity flavor. The salt adds a nice layer of flavor as well. After the sweetness hits, that's when the salt comes through, creating a really interesting combination.

The only problem for me is that the unique flavor of the granola was somewhat overwhelmed when I combined this with yogurt - all I could really taste was the sweetness, and those other layers of flavor sort of disappeared. I think this granola might be best straight up by the handful. Of course, I didn't get a chance to try this with ricotta and berries like the author suggests, but perhaps that's another solution that would compliment the granola instead of overwhelming it. Something to keep in mind for the next batch.


Enjoying some granola at work, as I am known to do.

Friday, August 14, 2009

I made Salmon and that pesto pea rice that Alena made!


Greetings from Albuquerque!

I wanted to share my easy salmon marinade with everyone, and I decided to take Alena up on her suggestion to pair her pesto peas and rice dish with fish Alena's and I'm certainly glad I did!

Grocery List for The Marinade

2 pieces of 6 ounce Salmon (Sockeye is more fishy, Atlantic is mild and buttery) I know there is an on going debate about Farm raised Salmon, and wild caught etc. but no judgement here, just eat what you're comfortable with.

2 TBS Soy Sauce
2 TBS Tequila Lime Hot sauce (We picked this up in Austin, TX at the Tears of Joy Hot Sauce Shop Super delicious stuff! If you don't have that, use whatever hot sauce you have laying around. I highly recommend Tequila Lime hot sauce for fish marinades. It's also an important Southwest flavor, and it's unique to that area.)
6 TBS Olive Oil
2-4 TBS Balsamic Vinegrette
pinch of Salt and pinch of pepper
the juice of half a lemon
3 cloves crushed/chopped garlic
2 TBS Honey


Mix all the ingredients above into a bowl, and put your fish filets skin side up meat side down into the marinade. (Remember the longer your fish sits in these flavors the better, but usually 30-45 minutes is fine.) This marinade also works well on Tuna steaks!


Put the fish and marinade in the fridge while you whip up your side dish. I followed Alena's recipe exactly, except as well as peas I put in some nice, meaty, fresh shiitake mushrooms. I sauteed the mushrooms in a little bit of butter and added at the same time as the peas.


While the rice is setting, before you add the peas and mushrooms, take your fish out of the fridge, and put it in your oven on Broil for about 15-20 minutes. (Depending on how thick your fish cut is.) Make sure you remove the fish from the marinade when placing it on your broil pan. Do not drizzle any juices over your fish it will produce it's own in the oven!

Once your fish is done broiling, go ahead and serve this up! I highly recommend eating this meal with a lovely glass of white wine, preferably a Riesling!

Enjoy!

Monday, August 3, 2009

I made Arborio Rice with Spinach-Basil Pesto and Peas!


So here I go with another "lazy risotto". Ain't no shame in it!

This is another dish I cooked up on a sleepy weeknight when I also really did not have too much food in the house. But this just proves that you can cook up something fast and tasty with what you got around.

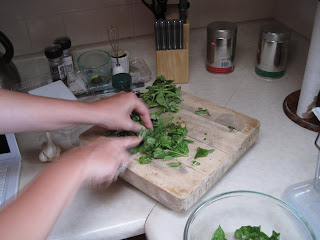
First, I made a spinach-basil pesto. I used:

-Equal proportions spinach + basil (I used about 1/2 a bag of baby spinach and some basil leaves from my sad little basil plant*
-Some walnuts
-1 or 2 cloves garlic
-juice of 1 lemon
-olive oil
-salt+pepper

*Since I did not have enough fresh basil, I supplemented my pesto with some jarred pesto from Trader Joe's, which I like to keep on hand for moments just like this! Again, ain't no shame in it. I used the hand blender! (Sarah's fave technique.)

Then I cooked up some arborio rice in the same fashion as my lazy risotto. While that cooked, I looked around my kitchen for other elements to add to the dish. I came up with some frozen peas and Parmesan cheese and decided that they would go nicely with the pesto.

I sauteed the peas in a pan for just a few minutes to thaw them and get the moisture out. If you have fresh peas, even better, but frozen will do the job admirably. Just make sure not to throw them in the pot with the rice as it cooks - even though this will defrost and cook them, by the time the rice is done, they'll be overcooked and mushy. Mushy peas are not cool. I know they are a popular thing in England, but I don't get it.

Once your rice is done and has a nice chew to it, (about 12 minutes, maybe), take it off the heat and stir in the peas, some grated parm and the pesto - add gradually to your liking. Top with some more Parmesan cheese. (Also delicious I bet: ricotta or goat cheese.)

The peas add a nice sweetness to the rice and all the salty pesto and cheese. Fresh tomatoes would be tasty as well, although they would alter the all-green theme of the dish.

This dish was a tasty and satisfying light dinner. I think it would also make a great side dish paired with fish or shrimp or even just a really good salad. I brought the leftovers to work for lunch the next day and was very happy.