Saturday, October 29, 2011

I made (subtle) peanut butter cookies!

Hi friends,

While my cooking skills seem to be plateauing at mediocre, my baking skills continue to get better. I made peanut butter cookies from a recipe that I was able to successfully adapt from other recipes. Not that novel of an idea for most of you, but when I do this, sometimes the results are disastrous!

Let me warn you that this recipe is not REALLY rich in peanut butter taste. They are definitely peanut butter cookies, but the flavor of the PB isn't overpowering. It's almost like 3/4th PB cookie and 1/4th sugar cookie taste-wise. I didn't do this on purpose (of course), I just used as much peanut butter as I had hoping that it would all turn out OK. I think this might be my favorite recipe so far, though!


Here's the plan:

Ingredients

  • 1/2 cup unsalted butter
  • 1/2 cup smooth peanut butter
  • 1/2 cup white sugar
  • 1/2 cup packed light brown sugar
  • 1/2 teaspoon vanilla extract
  • 1 egg
  • 1 1/4 cups all-purpose flour
  • 1/2 teaspoon baking powder
  • 3/4 teaspoons baking soda
  • 1/4 teaspoon salt

Baking Directions

  1. Preheat oven to 375 degrees.
  2. In a medium sized mixing bowl, beat together butter, peanut butter, sugars, and vanilla extract. Look for a creamy texture (after a minute or so), and make sure the brown sugar hasn't clumped anywhere (you may need to use a fork to break those up). Beat in the egg well.
  3. In a separate bowl, sift together your dry ingredients: flour, baking soda, baking powder, and salt. Pour dry ingredients into batter and use hand mixer.
  4. Put dough and baking pan in refrigerator for an hour.
  5. Roll dough into 1 1/2 inch balls with your hand and put on baking sheet. Score each ball with a fork, making the pattern of your choice (I opted for classic hash marks). Bake in the oven at 375 F for about 9-10 minutes. Cookies should be just beginning to turn a light brown on the edges. Take them out earlier rather than later because a dry PB cookie is no good!
  6. Let cookies sit for 5 minutes on baking sheet and then transfer to a wire cooling rack.
  7. Eat while hot with a glass of milk!
Let me know if you try this recipe and what you think. They were a hit with everyone who tried them, including my husband who groans when I make any peanut butter recipe.

Love,
K

Sunday, August 28, 2011

Post-Irene Beer-Glazed Black Beans

Hello! Wow, it has been a while.

Like many others on the East Coast, I have been cooped up this weekend due to Hurricane Irene. Thankfully, the hurricane was not as severe in Brooklyn as it might have been, and I did not have to break into the bounty of canned goods that I had bought as a precaution. But I figured it was a good opportunity to share this recipe with everyone, since lots of folks affected by Irene may find that they have some extra black beans on hand right about now. And of course, they are a pantry staple for many people regardless.

This recipe is from Mark Bittman's "How To Cook Everything" Book. I actually don't have the book, but the iphone app! I really like the app - comes in handy when I am bored on the subway - I can just look through recipes and decide what to make for dinner when I get home. OK so here are the cast of characters for the recipe:


Ingredients:

2 tbsp extra virgin olive oil
1 onion, chopped (sometimes I am lazy and leave out the onion, it's still good)
1 tbsp minced garlic
1 cup beer
3 cups cooked or canned black beans, drained but moist, liquid reserved
1 tbsp chili powder
1 tbsp honey
salt and pepper to taste


Directions
Put the oil in a skillet over medium-high heat. When hot, add the onion and cook, stirring occasionally, until soft, about 5 minutes. Add the garlic, cook for about a minute, then add the beer, beans, chili powder, honey and some salt and pepper.
Bring to a steady bubble and cook until the liquid is slightly reduced and thickened, about 15 minutes. Taste and adjust the seasoning. Serve immediately. Can also be stored in the refrigerator up to 3 days.

Also: dont forget!!! You can always adjust the proportions in the recipe to make less beans. I usually just make it with one can. Bittman also notes that you can add exciting things like bacon, tomatoes, or chipotle paste to the recipe. As you can see in the photo above, sometimes I add a bit of salsa.

I don't have a pic of the finished product (let's face it, black beans are not that photogenic.) But, the end result is rich and creamy and sorta sweet/spicy at the same time. It goes well with eggs, tortillas, avocado, rice, cheese, etc. Anything you would normally eat with black beans - go for it.

Also, it should be mentioned, that if you're in the NYC area and have extra food supplies due to the hurricane, you can always donate them to the Food Bank for New York City. Info HERE.

Hope everyone stayed safe during the hurricane.

Tuesday, March 15, 2011

I made carrot soup and gruyere biscuits!

I wrote about soup and biscuits for my last post, but these are different (and equally good) soup and biscuits and deserve their equal share of attention and praise. Carrots are kind of a second tier vegetable – I wouldn't usually pick them out of a line up, but every once in a while they are EXACTLY what I want. They keep really well in the fridge, which is also a plus, especially with a recipe that calls for over a pound of them. The soup is from 101 cookbooks; it's the simplest carrot soup recipe I've come across and I like it the best. The biscuit recipe is Ina Garten's. The recipe calls for cheddar cheese but I couldn't find any in the fridge (*someone* left it in one of the Coop bags when unpacking the groceries) so I used gruyere. These are flaky and flavorful biscuits; they are also rectangular, so prepare yourself. I recommend having the extras the next morning with a scrambled egg. Enjoy!

Carrot Soup (serves 4) (maybe with other dishes)

1 1/4 pounds carrots
1 tablespoon extra-virgin olive oil (or clarified butter)
2 medium cloves garlic, minced
1 large yellow onion, chopped
3 cups+ vegetable stock or water (I used 2 cups stock/2 cups water – added an extra cup)
juice of 1/2 a lemon (I like a little more lemon, but taste and see what you like)
fine grain sea salt (as much as you need) (yeah, kosher salt)

Scrub the carrots and cut into 1 inch chunks. Heat olive oil in a soup pot over medium heat. Add onions and garlic and saute for a few minutes until onions are translucent. Add the stock and carrots and bring to a gentle boil. (I add the carrots a few minutes before the stock and saute a bit; I think it makes them more flavorful) Bring to a gentle boil and then lower to a simmer. Let it go for 20-30 minutes, or until carrots are tender. Try not to overcook. When tender, turn off heat and let cool for a few minutes.

Puree with an immersion blender (or regular blender if you don't have an immersion one). Salt and pepper to taste. Heidi says, “keep adding a few pinches at a time until the carrot flavor really pops.” Finish with a drizzle of olive oil or red chile oil.


Buttermilk Cheddar Biscuits (Ina Garten)

2 C flour, plus more as needed
1 Tablespoon baking powder
1 teaspoon kosher salt
3/4 C butter (1 1/2 sticks)
1/2 C buttermilk (I used lowfat milk with a ½ TBS of white vinegar. Let it sit for 10 min before use)
1 egg
1 C grated extra sharp cheddar cheese
Egg Wash: 1 egg, beaten with 1 T water or milk

Preheat the oven to 425 degrees.

Place 2 cups of flour, the baking powder, and salt in the bowl of an electric mixer fitted with the paddle attachment. With the mixer on low, add the butter and mix until the butter is the size of peas. (You could do this by hand if you don't have a mixer, it will just take longer)

Combine the buttermilk and egg in a small cup and beat lightly with a fork. With the mixer still on low, quickly add the buttermilk mixture to the flour mixture and mix only until moistened. In a small bowl, mix the Cheddar with small handful of flour and, with the mixer still on low, add the cheese to the dough. Mix only until roughly combined.

Dump out onto a well-floured board and knead lightly about 6 times. Roll the dough out to a rectangle 10 by 5 inches. With a knife, cut the dough lengthwise in half and then across in quarters, making 8 rough rectangles. Transfer to a sheet pan lined with parchment paper. Brush the tops with the egg wash, sprinkle with salt, if using, and bake for 20 to 25 minutes, until the tops are browned and the biscuits are cooked through. Serve hot or warm.

Tuesday, February 8, 2011

I made pasta with french lentils, kale and artichoke hearts


I just made this last night, and it was so good I had it again tonight for dinner and decided to post about it immediately. The secret is actually caramelizing, not just sauteing the onions, which means cooking them very slowly on very low heat, and that takes some patience. But it brings out the delicious sweetness of the lentils, and you can use that time to de-stem the kale and chop the artichoke hearts and boom--dinner is ready.

The recipe is below. The artichokes were my addition--it adds some nice contrast to the sweetness in the dish. I also tossed the whole batch with some Romano cheese, which has a similar effect...

Pasta with Lentils and Kale and 'Chokes!


Ingredients
  • 1/2 cup French (small) green lentils
  • 2 cups water
  • 3/4 teaspoon salt
  • 6 tablespoons extra-virgin olive oil
  • 1 large onion, finely chopped (2 cups)
  • 1/4 teaspoon black pepper
  • 3/4 pound kale (preferably Tuscan; sometimes labeled "lacinato")
  • 3/4 pound dried short pasta (I used whole wheat fusili.)
  • 1 can artichoke hearts, quartered--if you're doing it my way.
Simmer lentils in water (2 cups) (I used broth--in which case salt isn't necessary) with 1/4 teaspoon salt in a 1- to 1 1/2-quart saucepan, uncovered, adding more water if necessary to keep lentils barely covered, until tender but not falling apart, 20 to 25 minutes. Remove from heat and season with salt.

While lentils simmer, heat 1/4 cup oil in a 12-inch heavy skillet over moderately high heat until hot but not smoking, then sauté onion with pepper and remaining 1/2 teaspoon salt, stirring, 1 minute. Reduce heat to low and cook, covered, stirring occasionally, until onions are soft and golden (stir more frequently toward end of cooking), about 20 minutes. Remove lid and increase heat to moderate, then cook, stirring frequently, until onion is golden brown, 5 to 10 minutes more.

While onion cooks, cut out and discard stems and center ribs from kale. Cook kale in a 6- to 8-quart pot of boiling salted water , uncovered, stirring occasionally, until just tender, 5 to 8 minutes. Transfer kale with tongs to a colander to drain, pressing lightly. Keep pot of water at a boil, covered.

Coarsely chop kale and add to onion along with lentils (including lentil-cooking liquid), then simmer, stirring, 1 minute. (Add the 'chokes here too!) Season with salt and pepper.

Add pasta to kale-cooking liquid and boil, uncovered, until al dente. Reserve about 1 cup pasta-cooking liquid, then drain pasta in a colander. Add pasta to lentil mixture along with about 1/3 cup of pasta-cooking liquid (or enough to keep pasta moist) and cook over high heat, tossing, 1 minute. Season with salt and pepper and drizzle with remaining 2 tablespoons oil.


Saturday, January 29, 2011

I made Tomato Soup and Cheddar Chipotle Biscuits!

This meal was a fancified tomato soup and grilled cheese. I made it on Monday when it was freaky cold and I wanted a cozy meal and a way to use up the buttermilk in the fridge. I bought buttermilk a few weeks ago for something (I can't remember what right now) and only used half a cup, and the remainder has sat there ever since, reminding me of my New Year's resolution to waste less food. The soup recipe is from Not Eating Out in New York and the biscuit recipe is from the Baked cookbook but I found it on Serious Eats.

Tomato Soup to Write Home About
(makes about 6 servings - maybe if you were having multiple courses. 3-4 servings otherwise)
1 large can peeled Italian plum tomatoes
1 small onion, chopped
1 small celery rib, chopped
1 small carrot, chopped

2-3 fresh cayenne or serrano peppers, seeded and chopped (or substitute with dried red chile flakes to taste) (I used on jalapeno, seeded. It was kicky but not overpowering).
1 bunch fresh basil leaves (She leaves them whole, but I decided to chop them)
salt and freshly ground pepper
3-4 TBS olive oil (plus more for drizzling as garnish)

Sweat the onions, carrots, celery and chiles in olive oil in a large, heavy-bottomed pot or Dutch oven. Add a pinch of salt and pepper and cook, stirring over low heat for about 8 minutes or until softened and lightly browned (this took about 15 minutes for me). Add the tomatoes and all their juices. Transfer mixture to a blender (or use your immersion blender) and pulse until mixture is completely smooth. Return to the pot and bring just to a boil. Reduce heat to a simmer and cook, covered, for at least 40 minutes. Season with salt and pepper to taste. Add the basil leaves and serve. Garnish each bowl with a drizzle of olive oil, if desired.

Chipotle Cheddar Biscuits from Baked
makes about 20 small biscuits (I ended up with 16)

  • 2 1/3 cups all-purpose flour
  • 1 teaspoon freshly ground black pepper (it’s a lot of grinding, but it’s worth it!)
  • 1 tablespoon chipotle powder (I have chipotle chile powder and it’s really versatile and awesome. I wonder if you could use the adobo from canned chipotles if you don’t have the powder on hand?)
  • 1 tablespoon sugar
  • 1 tablespoon baking powder
  • 1 teaspoon cream of tartar
  • 1 teaspoon salt
  • 1/2 cup (1 stick) unsalted butter, chilled and cut into 1-inch pieces
  • 2 cups grated and tightly packed sharp cheddar cheese
  • 1 1/4 cups buttermilk
  • 1 large egg
  • Kosher salt for topping
  1. Preheat the oven to 400°F. Line a baking sheet with parchment paper.
  2. In a large bowl, whisk together the flour, pepper, chipotle powder, sugar, baking powder, cream of tartar, and the 1 teaspoon of salt.
  3. Add the butter and, using your hands or the back of a wooden spoon, work the butter into the dough. (If you use your hands to do this, don’t touch your eyes - they will burn!) The mixture should look like coarse sand. Add the cheese and stir to thoroughly incorporate it into the dough.
  4. In a small bowl, whisk together the buttermilk and egg. Add to the flour mixture and stir until just incorporated. Do not overmix.
  5. Use a small ice cream scoop or a 1/4-cup measuring cup to scoop the dough and drop it in mounds onto the prepared baking sheet about 2 inches apart. Sprinkle with kosher salt and bake in the center of the oven for about 20 minutes, rotating the baking sheet halfway through the baking time, until golden brown and a toothpick inserted in the center of a biscuit comes out clean.
  6. Transfer the biscuits to a cooling rack. The biscuits can be served slightly warm or at room temperature (we like them slightly warm).
  7. Store the biscuits in an airtight container for up to 2 days. (A toaster oven is great for re-heating)

Friday, January 28, 2011

I made farro and roasted butternut squash


I have been pretty curious about farro lately, and the other day I decided to finally give it a try.

VERDICT: It's my new favorite grain! It's more plump and rice-like than bulgar, and more arborio-like than plain old brown rice. You guys gotta try it.

I found this recipe on 101Cookbooks. It was hearty and delicious--a great healthy fall or winter meal. The only change I might make is not toasting the walnuts--it was too much with the other heavy flavors for my taste. Or maybe I'd use pine nuts instead.

Without further ado:

Farro and Roasted Butternut Squash

2 cups farro, rinsed and drained
2 teaspoons fine-grain sea salt
5 cups water (or stock)
3 cups butternut squash, cut into 1/2-inch dice
1 large red onion cut into 1/8ths
1 tablespoon fresh thyme, minced
3 tablespoons olive oil
1 tablespoon balsamic vinegar
1 cup walnuts, deeply toasted
3 tablespoons toasted walnut oil (or more olive oil)
1/4 cup goat cheese, crumbled (I found it needed more cheese than this, so I through in some feta, and I actually liked that better. The saltiness contrasts the sweetness of the balsalmic, squash and onions nicely.)

Preheat oven to 375.

Combine the farro, salt, and water in a large, heavy saucepan over medium heat. Cover and simmer, stirring occasionally, until the farro is tender, 45 minutes to an hour, or about half the time if you are using semi-pearled farro. Taste often as it is cooking, you want it to be toothsome and retain structure. Remove from heat, drain any excess water, and set aside.

While the farro is cooking toss the squash, onion, and thyme with the olive oil, balsamic vinegar and a couple big pinches of salt on a rimmed baking sheet. Arrange in a single layer and place in the oven for about 20 minutes. Toss the squash and onions every 5-7 minutes to get browning on multiple sides. Remove from the oven, let cool a bit, and mince just 1/2 of the red onions.

In a large bowl gently toss the everything (except the goat cheese) with the toasted walnut oil (or olive oil). Taste and add a bit of salt if necessary. Serve family-style in a simple bowl or on a platter garnished with the goat cheese.

Serves 6-8 as a side, less as a main. (No way, Heidi. I had enough for several dinners and lunches for me and my roommates. I would guess 8-10 entree-sized portions!)


Thursday, January 27, 2011

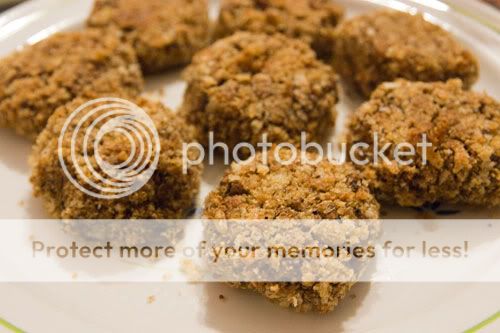
I Made Black-eyed Pea and Quinoa Croquettes!

Quinoa is my favorite grain because it has tons of fiber and it is a complete protein. My friend at the Natural Gourmet School told me that essentially all quinoa is organic, because it is only produced in certain regions of Bolivia and Peru, and farmers monitor each other to guarantee their organic certification. (As in, if one farmer decides to use pesticides, then it would mess it up for everyone, so no one wants to be caught with pesticides. Thus, organic!) The following recipe comes from Vegan with a Vengeance (p. 88-89).
  • 1 1/2 cups cooked black-eyed peas, drained, or 1 (15-0z) can, drained and rinsed
  • 1 tbsp olive oil
  • 1 tbsp soy sauce
  • 1 cup cooked quinoa, at room temperature
  • 1/2 tsp dried thyme, crumbled
  • 1/2 tsp dried basil, crumbled
  • 1 tsp paprika
Preheat the oven to 350F.
In a mixing bowl mash the black-eyed peas with a potato masher and then your hands. Add the olive oil and soy sauce and stir. Add the quinoa and spices and combine the mixture with your hands. You should be able to mold them into balls that readily stick together.
  • 1/2 cup bread crumbs (I didn't have any, so I toasted some sourdough slices till crispy and food processed them into crumbs)
  • 1/8 tsp salt
  • A few dashes of fresh black pepper
  • 1/2 teaspoon finely grated lemon zest (I used a squirt of bottled lemon juice)
  • 2 teaspoons olive oil
In a small bowl mix together all the ingredients for the breading. Spray a baking pan with a little oil. Form the croquettes into walnut-sized balls. Gently roll the balls between your palms three or four times, then flatten out the ends so that the croquettes resemble marshmallows. Coat each ball with the bread crumbs and place on the prepared baking sheet. When all the croquettes have been formed, spray lightly with oil. Bake for 40 minutes, turning once after 20 minutes.

The author serves these croquettes with cooked quinoa and mushroom sauce. I didn't have time to make the mushroom sauce, so I just used ketchup and mustard. Also, these croquettes are so protein-packed because of power combo of black-eyed peas and quinoa that I didn't need any additional quinoa on the side. Lastly, after twenty minutes of baking, when you flip over the croquettes, it seems like they are overly crumbling. Wrong! After baking for a total of 40 minutes, the croquettes hold together very nicely.

EDIT: I tried this with kidney beans (food processed the first step instead of mashing). Doesn't work as well...

Saturday, January 15, 2011

I made mulligatawny

Yo everybody. I made this a looong time ago. We're talking back in October. It was DELISH, and I think I'm going to make it again soon. But it wasn't what I had in mind when I started out. After doing a little research I learned that the bright red, tomato based Indian soup I was thinking of is often called mulligatawny but is actually Rasam. That will have to be my next project, as I continue to pursue my goal of making every variety of lentil soup known to man.

I followed the recipe pretty exactly, except I had to substitute some of the harder to find ingredients. I couldn't find tamarind concentrate, so I added extra lemon juice because I think tamarind would add a kind of fruity bitterness? I used ground cardamom instead of the pods, and dried coriander instead of fresh leaves. Next time I'll have to go stock up at an Indian grocery store because I bet all those ingredients do make a big difference. But even with the substitutes, this soup had such a complex flavor! All those spices (as pictured above)! And you even through some apple in there--who would have guessed?


Mulligatawny
from Michelle Chen, author of the recipe: "Literally meaning pepper water, Mulligatawny Soup is an Anglo-Indian invention created by servants for the English Raj who demanded a soup course from a cuisine that had never produced one."

Ingredients

  • 1 tablespoon ghee (clarified butter), or vegetable oil
  • 1 onion, chopped
  • 4 cloves garlic, minced
  • 2 teaspoons grated fresh ginger
  • 2 green chile peppers, chopped
  • 1/4 teaspoon ground cinnamon
  • 1/4 teaspoon ground cloves
  • 2 teaspoons ground coriander seed
  • 1 1/2 teaspoons ground cumin
  • 1 teaspoon ground turmeric
  • 4 pods cardamom, bruised
  • 1 tablespoon chopped fresh curry
  • 1 carrot, chopped
  • 1 apple - peeled, cored, and chopped
  • 1 large potato, peeled and diced
  • 1 cup Masoor dhal (red lentils), rinsed, drained
  • 8 cups chicken broth (I used No-Chicken broth)
  • 1 tablespoon tamarind concentrate
  • 1 tablespoon lemon juice
  • 2 cups coconut milk
  • 2 tablespoons chopped fresh cilantro

Directions

  1. Heat ghee or vegetable oil in large pan (use low heat); cook onion, garlic, ginger, chilies, spices and curry leaves, stirring, until onion is browned lightly and mixture is fragrant. Do not over brown the onion or else it will give the soup a burnt taste.
  2. Add carrot, apple, potato, dhal, and chicken stock to pan; simmer, covered, for about 15 minutes or until vegetables are just tender. Discard cardamom pods and curry leaves.
  3. Blend or process soup mixture, in batches, until pureed; return to pan. (I used an immersion blender, which worked just as well.) Add tamarind, lemon juice, coconut milk and fresh coriander leaves; stir until heated through.


Wednesday, January 12, 2011

We made eggplant parmigiana in LA!


Last week, Joey, Lauren and I went to LA to visit our dear friend, W. Hunter McClamrock. We drove to San Francisco and back, got picked up by a limo on New Years Eve, were forced to take a crazy detour through the mountains because of high winds and snow in "The Grapevine" (don't ask me California is crazy), rolled around in the fake grass at the Getty Center, ate delicious tacos and sushi and Umami (veggie) burgers, and generally had a lot of awesome adventures. On our last night, we wanted to make dinner and Hunter requested Joey's signature dish, eggplant parmigiana. Joey learned how to make this dish from his mama and has since perfected it on his own.

Most of us associate eggplant parm with the kind you get at most Italian restaurants: one cutlet of thickly breaded or deep fried eggplant drowning in sauce and mozzarella cheese. But the authentic and much more delicious way is to lightly fry thin slices of eggplant and then layer them like a lasagna with sauce and scattered chunks of mozzarella cheese.


But when it came time to start cooking, things got crazy. Let's just say Joey and Lauren had eaten a certain baked good. And let's just say the consumption of said baked good left them somewhat... indisposed (see the pic of Joey below--he was in no condition to cook.) So that left me to make the parm. I was a little intimidated, since it's always been Joey's thing and it's a pretty labor intensive dish, but I'd watched him enough times that I was pretty sure I knew all the steps.


First, of course, I made Mama Vallese's Vegetable Sauce.

Then we skinned three medium-sized eggplants and sliced them longways.

Then we prepared two bowls for the coating: one with flour, one with beaten eggs and parmesan.

Now here comes the labor-intensive part. Get a good inch of vegetable oil going on the pan, dip each slice of eggplant first in the flour, then the egg mixture, and fry those babies a few minutes on each side until the coating turns golden. You will have to do this in many, many batches. Unless you have an enormous pan. As you finish each batch, lay the fried slices on paper towels to absorb some of the oil.

When you're done with all that frying, the rest is easy. Get out your 10 x 15 baking dish and cover the bottom with sauce. Then place pieces of eggplant in one layer, minimizing any spaces between them. Then another THIN layer of more sauce. I would even call it more of a DRIZZLE than an actual layer. Otherwise the whole thing will get soupy and the eggplant won't stay as crisp. Then evenly scatter chunks of mozzarella. Then sprinkle some parm. Repeat until you've used all your eggplant, or until the baking dish can't hold anymore. On the top layer, scatter the mozz (not too much), and then throw on lotsa parmesan.

Cover the whole thing in aluminum foil, and bake at 375 for 20 minutes. Remove foil and bake 10 minutes more. It should be all bubbly and brown and delicious looking.

And that's it! Joey ended up recovering in time to help me fry some of the eggplant, which it would have taken hours for me to do on my own. This dish is not difficult to make, but it's way easier if you have a few helpers. Also, you can halve this menu and make it in a smaller pan if you're not serving 10 people like we were. And I guess you don't HAVE to use Mama Vallese's Vegetable Sauce, but the quality of sauce can make or break this dish, so if you're going to buy one, spring for the fancy gourmet stuff.

Here is what our beautiful table looked like in Irma's beautiful apartment in Los Feliz ("The Happiness"--what a nice name for a hood!):


And here is all of us, so psyched to finally eat that parm!

Tuesday, January 11, 2011

I Made Vegan Lasagna!

Hi, again! Continuing my month of home cooking, I made vegan lasagna! I got the recipe from a friend going to culinary school at the Natural Gourmet Institute, and it's pretty damn good. I've shared a batch with my carnivore parents and brother (I'm vegan, if you haven't noticed), and they didn't realize that the "ricotta" was actually tofu!
Sorry, too lazy to plate and take a proper picture this time!
  • 1 box of lasagna noodles
  • 9 x 13" pan
Prepare lasagna noodles as directed on the box. Once they're done, drain and lay them on aluminum foil or parchment paper so they won't stock together. Preheat oven to 375F.
  • 1/2 medium onion
  • 2 cloves garlic minced
  • 2 tbsp olive oil
  • 1 large can pureed tomato
  • spices to taste (basil, cayenne, etc.)
The tomato sauce part of the recipe is really up to you! The way I usually do sauces is very simple: just sautée finely chopped onions and minced garlic in olive oil, add pureed tomato, add some sugar to taste, add spices to taste (this time, I used cayenne (the noodles and "ricotta" balanced out a pretty spicy sauce), cumin, coriander, sage, basil). I let this simmer on a very low flame while I prepare the "ricotta."
  • 2 pounds firm tofu, pressed (squeezed)
  • 5 tbsp olive oil
  • 3 tbsp lemon juice
  • 1 tsp salt
  • 4 garlic cloves
  • 2 tsp miso (you can replace with 1 tsp peanut butter and soy sauce, or with tahini and little soy sauce)
  • fresh rosemary finely chopped or whatever herbs you like (basil)
Put tofu, olive oil, lemon juice, salt, garlic, miso, and herbs into a food processor and mix until tofu is smooth with a slight granular texture. The flavoring of the tofu "ricotta" is up to you as well. I had a mood for rosemary the last time I made this, so I was very generous with that herb.

Assemble the lasagna layers. In a 9 x 13" pan, place a layer of sauce, then noodles (I fit three noodles per layer), then thin layer of sauce (just enough to cover the noodles), then a layer of "ricotta", then noodles, then sauce, then "ricotta", and so on. The top layer should be noodles covered by sauce. I've been trying to eat more "naturally" lately (since it's not that great to eat Tofurky, Tofutti, and vegan substitutes all the time), so instead of having a layer of vegan cheese (like Daiya), I just had a generous layer of sauce. Bake in the oven for around 30 minutes, until hot (check your baking frequently!).

The lasagna seems to taste better after being refrigerated overnight... The portions mentioned above are definitely A LOT and enough for a few days of lunches and dinners! This is a pretty simple recipe and very adjustable. I thought it was worth sharing because it is an example of an easily veganizable recipe. Bon appétit.

Saturday, January 8, 2011

I made roasted corn pudding in acorn squash!

Yo everyone on the blog!


I made this a while back, but didn't post it. It happens. But this recipe was really good and pretty easy. The hardest part is probably cutting the squash. I actually did not use acorn squash but "carnival squash" - it is the kind that looks like acorn squash in shape, but instead of being dark green, it has multicolored flecks on the outside. I think they are pretty comparable.

This is the recipe that I used. I basically followed it exactly!

Here is the recipe with some of my notes:

Roasted Corn Pudding in Acorn Squash Recipe
Taken from The Vegetarian Compass written by Karen Hubert Allison (via 101 Cookbooks):

(This recipe is for 1 squash, so just increase accordingly if you want to make more.)

1 small (2 lb.) acorn squash, cut in half lengthwise and seeded (or carnival squash)
1 tablespoon clarified butter or olive oil
1 cup milk
1 egg plus 2 egg whites
1/2 cup fresh corn kernels (or more if you like)
1/4 teaspoon anise seed, chopped (I omitted - don't like anise. I used some cayenne instead.)
1/2 cup chopped scallions
a tiny pinch of freshly grated nutmeg
1/4 teaspoon fine grain sea salt
1/3 cup grated white cheddar cheese

(You may end up with extra filling that doesn't fit in the squash. If so, you can put it in some buttered muffin tins or ramekins and bake it along with the squash - I did! It was good.)

Preheat the oven to 375F degrees with a rack in the middle.

Rub the orange flesh of the squash with the butter/oil. Place cut side up on a baking sheet. You will want it to sit flat (and not tip), if you are having trouble just level out the bottom using a knife. If the squash is tilting on the pan, the filling will run out - bad news. Cover the squash with foil and bake for 40 minutes or until the squash starts to get tender.

In a bowl combine the milk, eggs, corn, anise seed, half of the scallions, nutmeg, and salt. Fill each of the squash bowls 3/4 full (see head notes about using leftovers). Carefully transfer the squash back to the oven without spilling (tricky!).


Continue baking uncovered for another 30 - 50 minutes, or until the squash is fully cooked through, and the pudding has set. The amount of time it takes can vary wildly depending on the squash and oven. At the last minute sprinkle with cheese and finish with a flash under the broiler to brown the cheese. (I didn't use the broiler for this part, just used the regular oven.) Keep and eye on things, you can go from melted cheese to burnt and inedible in a flash. Serve hot sprinkled with the remaining scallions.

Serves 4 - 6.


I made fettuccine with Brussels sprouts and pine nuts


I have noticed that my cravings in winter are very specific and very constant. Last year it was butternut squash, and I put it in everything--soups, chilis, pastas, risottos, etc. This year I can't get enough Brussels sprouts.

This pic doesn't really do it justice, but this dish is extremely delicious. It's a great thing to make when you come home from a long day of being in the gross city slush and just want something quick and easy and comforting and warm that you can eat in a bowl while watching some sweet episodes, you know?

Fettuccine with Brussels Sprouts and Pine Nuts


Ingredients
  • 3/4 pound Brussels sprouts, trimmed
  • 1/2 pound dried egg fettuccine
  • 2 tablespoons unsalted butter
  • 2 tablespoons extra-virgin olive oil
  • 3 tablespoons pine nuts
  • I added a whole lotta lemon juice
Slice Brussels sprouts in a food processor fitted with slicing disk.

Cook fettuccine in a pasta pot of boiling salted water (3 tablespoons salt for 6 quarts water) until al dente.

Meanwhile, heat butter and oil in a large heavy skillet over medium heat until foam subsides, then cook pine nuts, stirring, until golden, 1 to 2 minutes. Add Brussels sprouts, 1/2 teaspoon salt, and 1/4 teaspoon pepper, then sauté over medium-high heat until tender and lightly browned, about 4 minutes.

Reserve 1/2 cup pasta-cooking water, then drain pasta and add to skillet, tossing with enough reserved water to moisten.


Friday, January 7, 2011

I Made a Chickpea-Quinoa Pilaf!

Happy New Year! It's been a while. A few minutes ago, as I was eating my leftover chickpea-quinoa pilaf from yesterday, I realized that this recipe was both simple and delicious so I thought I should share. Incidentally, I trying not to eat out that much this month since I just bought tickets to a cruise, so I'm planning on tons of cooking... Anyway, I had some quinoa lying around, and after looking through Veganomicon, I realized that I had everything I needed to make this hearty, protein-packed chickpea-quinoa pilaf (p.115-116):
  • 2 tablespoons olive oil
  • 1 small yellow onion, chopped finely (around 1 cup)
  • 2 cloves garlic, minced
In a small stock pot over medium heat, saute the onions in olive oil for about 7 minutes. Add the garlic and saute for 2 more minutes.
  • 1/2 teaspoon ground cumin
  • 1 tablespoon coriander seeds, crushed (I just used coriander??)
  • Several pinches of freshly ground black pepper
  • 1/2 teaspoon salt
  • 1 tablespoon tomato paste
Add the tomato paste, coriander, cumin, black pepper, and salt; saute for another minute. (I added some cherry tomatoes from my garden, the last batch from summer...)
  • 1 cup quinoa
Add the quinoa and saute for 2 minutes.
  • 2 cups cooked for 1 (15-ounce) can chickpeas, drained and rinsed
  • 2 cups vegetable broth or reconstituted bouillon
Add the chickpeas and broth; cover and bring to a boil. Once the mixture is boiling, lower the heat to very low, and cook for 18 minutes, or until the quinoa has absorbed all the water; stirr occasionally. Fluff with a fork and serve.